English
 日本語
日本語 Deutsch
 عربى
عربى 中文
中文

Solar Panel Fixing Brackets: Types, Materials, and How to Choose the Right Mounting
 2026.10.08
 Industry News
On a coastal rooftop project, a 500 kW array was almost built with standard galvanized steel fixing brackets that did not have enough corrosion protection. The issue was caught during a structural review, but it is a common near-miss. Solar panel fixing brackets are not an accessory to be chosen after the modules and inverters; they are the mechanical bridge between the array and the building. The right bracket must carry wind uplift, snow weight, and thermal movement while protecting the roof finish and connecting the module frames to ground. This guide compares bracket types, materials, and procurement checks so you can specify brackets with confidence.
What Are Solar Panel Fixing Brackets?
Solar panel fixing brackets include the rails, clamps, feet, hooks, bolts, flashings, and grounding hardware that hold PV modules in position. Their main function is to transfer gravity, wind, and snow loads to the roof or ground structure. A well-designed bracket assembly also sets the air gap under the module, which affects cooling and cleaning access, and it creates a continuous path for electrical grounding.
In practical terms, a fixing bracket system performs five tasks:
- Fix modules at the required tilt and orientation.
- Distribute gravity, wind, and snow loads safely.
- Resist uplift forces caused by wind passing over and under the array.
- Keep water out of roof penetrations and protect the roof finish.
- Provide a reliable grounding connection for the module frames.
Bracket Types by Mounting Scenario
The first step is to match the bracket type to the installation surface. Roof structures and open fields create different load paths, and each roof covering has its own fixing rules. The table below shows the main scenarios.
| Mounting scenario | Typical bracket set | Selection focus |
|---|---|---|
| Flat commercial roof | Ballasted non-penetrating or penetrating profiles | Roof load, wind uplift, waterproofing |
| Pitched tile roof | Tile hooks, rafter brackets, flashing kits | Roof material, rafter position, seal integrity |
| Metal roof | Standing seam clamps or screw-down feet | Panel profile, seam type, corrosion compatibility |
| TPO/PVC membrane roof | Adhesive bases or low-penetration mounts with flashing | Membrane compatibility, chemical resistance |
| Ground and hill terrain | Driven piles, C-channel rails, double-column or single-column supports | Soil conditions, slope, wind and snow loads |
Flat Roof Brackets
Flat roofs are common on commercial and industrial buildings. The two dominant methods are non-penetrating ballasted mounts and penetrating fixed mounts. Non-penetrating systems use concrete or paver ballast to hold the PV array down, which avoids roof penetrations but adds dead load. Penetrating systems use anchor bolts or screws through the roof deck, giving predictable pull-out resistance but requiring careful flashing. If roof load capacity is limited, non-penetrating systems are often preferred; if wind speeds are high, a penetrating design may be needed to meet uplift requirements.
 Non-penetrating Ballasted PV Mounting for Flat Concrete RoofsThis mounting system uses prefabricated concrete counterweights to avoid roof penetrations, making it suitable for flat commercial or industrial roofs with limited load capacity. Its adjustable tilt and corrosion-resistant materials support efficient installation without compromising waterproofing.View Product →
Pitched Roof Brackets
Tile roofs are widely used on residential and small commercial buildings. A tile roof bracket should connect directly to a rafter, not to the tile itself. The hook profile must match the tile shape, and flashing should drain water away from the roof. Metal roofs usually use standing seam clamps that grip the seam without puncturing the metal, or screw-down brackets where the panel profile allows. TPO and PVC roofs require membrane-friendly bases or low-penetration brackets with flashing caps. If the wrong base is used, thermal expansion and chemical contact can damage the membrane over time.
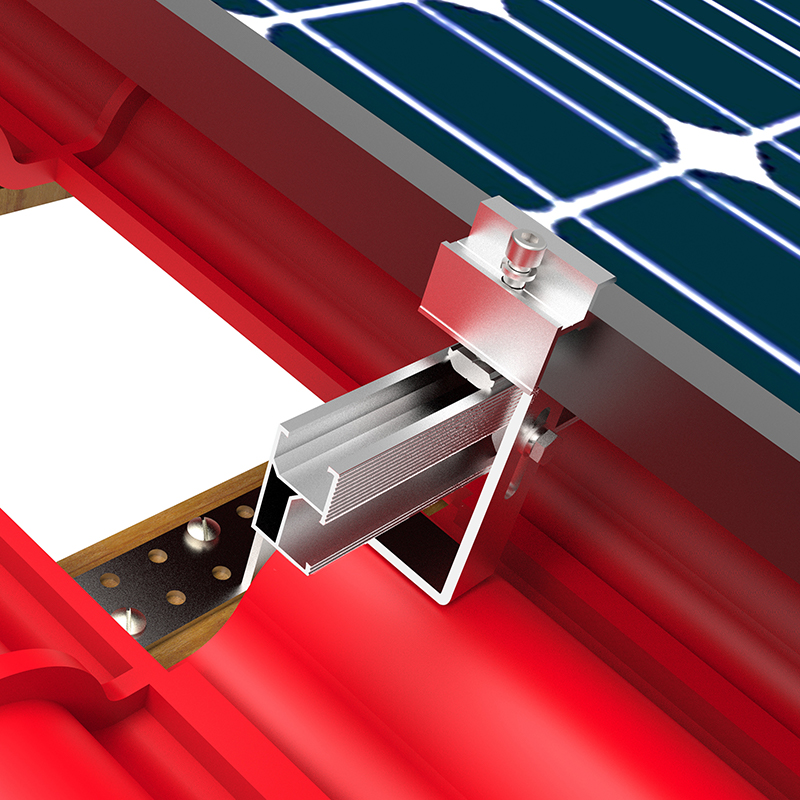 Adjustable Tile Roof PV Mounting Bracket for Ceramic and Slate RoofsDesigned for traditional tile roofs, this bracket connects securely to rafters and accommodates different tile profiles. Its adjustable base optimizes panel angle while preventing leaks, making it a reliable choice for residential and small commercial rooftop solar projects.View Product →
Ground and Mountain Brackets
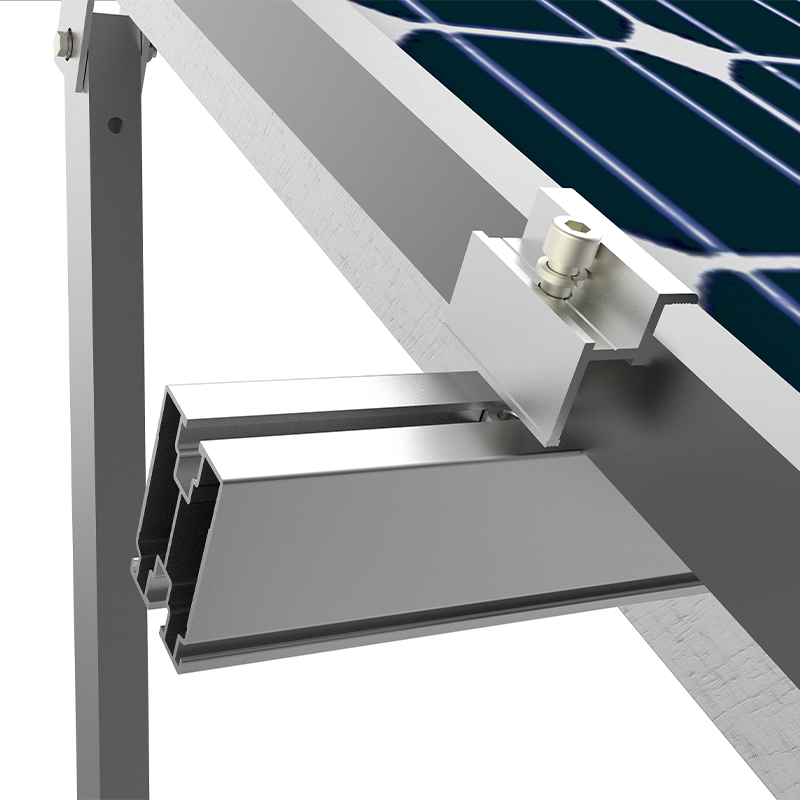
Ground-mounted systems use driven piles, screw piles, or concrete block foundations. The bracket assembly usually includes a vertical support, a horizontal rail, and module clamps. On sloped sites, double-column supports keep the rail level with fewer earthworks, while single-column sleeve brackets allow quick height adjustment on steep terrain. For agricultural or water-surface arrays, the bracket structure must also provide enough height and spacing to keep farming or fishing activities usable below the PV array.
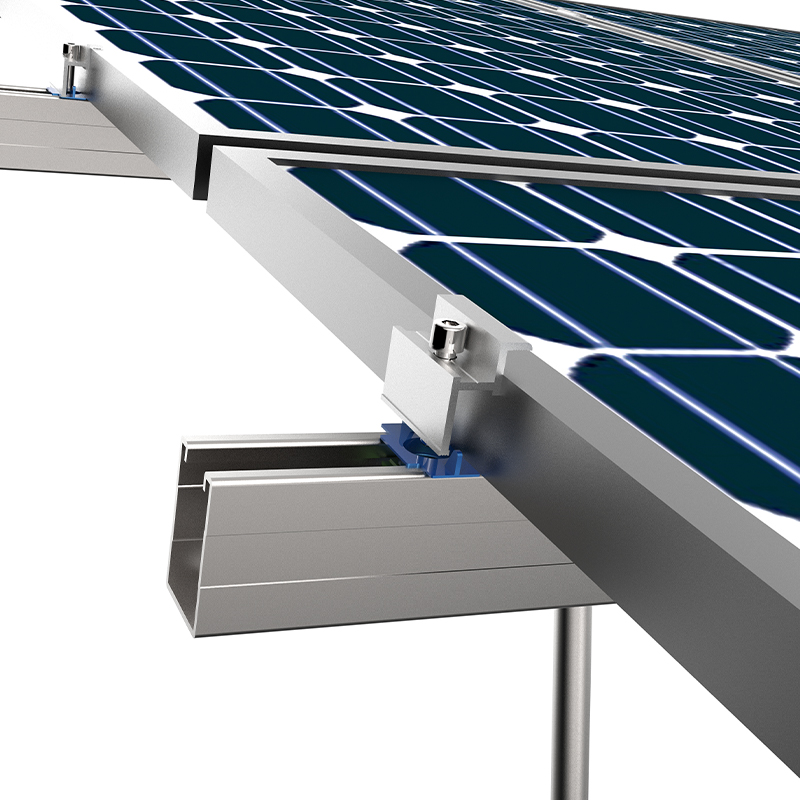 Double Column PV Mounting with Enhanced Wind and Snow Load ResistanceThis symmetrical double-column structure provides higher rigidity and wind resistance than single-column designs, ideal for high-wind or heavy-snow regions. It suits ground-mounted arrays with large spans, using galvanized steel or aluminum alloy and compatible with embedded or concrete pier foundations.View Product →
Material Selection and Corrosion Ratings
After the bracket layout is decided, material choice becomes the main reliability factor. Hot-dip galvanized steel offers high strength and low cost, which makes it standard for ground-mounted steel structures. Aluminum alloy is lighter, easier to handle, and more corrosion-resistant, but it needs sufficient wall thickness to handle the same loads. Stainless steel fasteners with A2 or A4 grades are used for bolts, clamps, and components exposed to moisture. Near the coast, A4 stainless steel is usually required because it gives better resistance to saltwater pitting.
| Environment | Bracket material | Fastener grade |
|---|---|---|
| Rural and suburban | Zinc-coated steel, aluminum | A2 stainless steel |
| Coastal and salt-exposed | Hot-dip galvanized heavy coating, aluminum | A4 stainless steel |
| Industrial and polluted | Aluminum or coated steel with robust coating | A4 stainless steel |
Coastal installers should check coating thickness at cut edges and drilled holes. Hot-dip galvanizing to standards such as ISO 1461 provides a measurable zinc layer, but any bare edge exposed after cutting can become an early corrosion point. Aluminum brackets avoid red rust, but they must be isolated from dissimilar metals so galvanic corrosion does not weaken connections.
Load Path, Wind Uplift, and Code Compliance
Fixing brackets are part of the structural load path. In a windstorm, uplift pressure tries to lift the module off the roof. Wind speeds around 180 km/h can produce uplift pressure greater than 1 kPa on a tilted rooftop module. That pressure travels through the clamps into the rails, then through the bracket into the roof or foundation. If any fastener is undersized, corroded, or not torqued to specification, the system can separate.
Specifiers should ask for load calculations or test reports that match the project wind speed, roof height, and terrain exposure. Edge modules often see higher pressure than the central array area, so edge clamps and end clamps should follow the manufacturer’s layout drawing. Mid clamps should be installed at every module junction where required, and torque values should be checked with a calibrated wrench. For framed modules, clamps need to match the frame width, usually 30 to 42 mm; a clamp that is too wide will not grip properly.
Installation and Procurement Pitfalls
Even a well-designed bracket system can fail if installation is careless. The most frequent problems are over-torqued bolts, wrong fastener grades, missing flashings, and mixing aluminum rails with galvanized steel bolts without isolation washers. Galvanic corrosion is a particular risk when dissimilar metals touch in a damp environment. Procurement teams should verify the material certificate and compare delivered parts with the approved sample or datasheet.
- Confirm that clamps and rails match the module frame width and thickness.
- Select roof-compatible footings: a tile hook, metal clamp, or membrane base are not interchangeable.
- Use stainless steel fasteners wherever moisture or condensation is present.
- Flash and seal every roof penetration, not only the visible ones.
- Install grounding washers and jumpers so the array forms a continuous electrical path.
- Keep drawings, load calculations, and torque specifications on site for inspectors.
For a more detailed walkthrough of roof layouts, anchor positions, and rail spacing, see our complete roof PV mounting system design and installation guide.
Why Bracket Choice Has a Long-Term Impact
PV modules can operate for 30 years, but brackets are usually installed once. After the array is assembled, a corroded bolt or loose clamp is hidden below the module and difficult to inspect. Bracket cost is a small share of the total project budget, yet bracket quality controls the mechanical lifetime of the entire array.
Project owners should evaluate brackets using verified load data, material grades, and past project references. A manufacturer with structural drawings and factory quality control can reduce the risk of off-grade material or missing components. The goal is not to spend more on brackets, but to spend enough to avoid the much higher cost of downtime, module breakage, and roof repair.
Conclusion
Solar panel fixing brackets should be specified with the same care as modules and inverters. Start with the mounting scenario: flat roof, pitched roof, metal roof, membrane roof, or open ground. Then choose material and corrosion protection based on the site environment. Finally, verify the load path with calculations, correct fastener selection, and careful installation. With those steps, the bracket system will support a safe and durable PV array for decades.
Message Us Now !

 +86-0523-80509588

 11th Floor, Wenchuang Building, 60 Fenghuang East Road, Hailing District, Taizhou City, JiangSu, China
Mounting Systems
Copyright © Taizhou Suneast New Energy Technology Co., Ltd.
All Rights Reserved.
 OEM/ODM Solar Panel Mounting Bracket Manufacturers