English
 日本語
日本語 Deutsch
 عربى
عربى 中文
中文
How to efficiently design and install roof PV mounting system: A complete guide
 Industry News
Main types of roof PV mounting system
The roof PV mounting system is a key component of the photovoltaic power generation system, and it undertakes the important task of firmly fixing the photovoltaic modules on the roof. With the development of photovoltaic technology and the increase in demand, the types of roof photovoltaic support systems are becoming increasingly diverse. When choosing a suitable photovoltaic support system, the structure, material, number of photovoltaic panels, and environmental factors of the roof must be considered. The following are several main types of roof PV mounting systems.
1. Fixed support system
The fixed support system is the most common type of roof photovoltaic support. Its characteristic is that once the support is installed, the angle will not be adjusted over time. The fixed support system is usually suitable for roofs that are not blocked and have sufficient direct sunlight. The system has a simple structure, low cost, and is easy to install, suitable for most residential and commercial buildings.
The advantage of the fixed support system is its cost-effectiveness, which can provide users with stable power generation performance. Since no moving mechanism is required, maintenance is simple and reliability is high. The fixed support usually forms an angle with the roof surface at a small angle, which can effectively absorb sunlight and ensure high power generation efficiency. For areas with good lighting conditions and low wind, the fixed support system is an economical and efficient choice.
2. Adjustable bracket system
Compared with fixed bracket system, adjustable bracket system has higher flexibility. Its main feature is that the tilt angle of photovoltaic modules can be adjusted according to seasonal changes or different sunshine angles. This type of bracket system is usually suitable for roofs with complex lighting conditions and need to optimize power generation efficiency.
Adjustable bracket system can be divided into two types: manual adjustment and automatic adjustment. The manual adjustment type requires the user to manually adjust the angle of the bracket according to seasonal and weather changes; while the automatic adjustment type automatically adjusts the angle through a mechanical device to maximize power generation efficiency. The advantage of adjustable brackets is that they can maximize the power generation performance of photovoltaic modules according to actual conditions, especially suitable for areas where angles need to be optimized. However, the installation cost of the automatic adjustment system is high and may require more maintenance and management.
3. Lightweight bracket system
Lightweight bracket systems usually use lightweight metal or plastic materials and are suitable for light roof structures or relatively weak roofs. This bracket system is particularly suitable for buildings with low structural load-bearing capacity. By using lightweight brackets, the burden on the roof can be effectively reduced and the pressure on the roof caused by overweight brackets can be avoided.
The advantages of this system are quick installation, low cost, and it is very suitable for later renovation or expansion. The disadvantage of lightweight mounting systems is that they may not be as stable as heavy-duty mounting systems, so special consideration needs to be given to environmental factors such as wind loads and rain and snow. Lightweight mounting systems are an ideal choice for buildings with light roofs or complex structures.
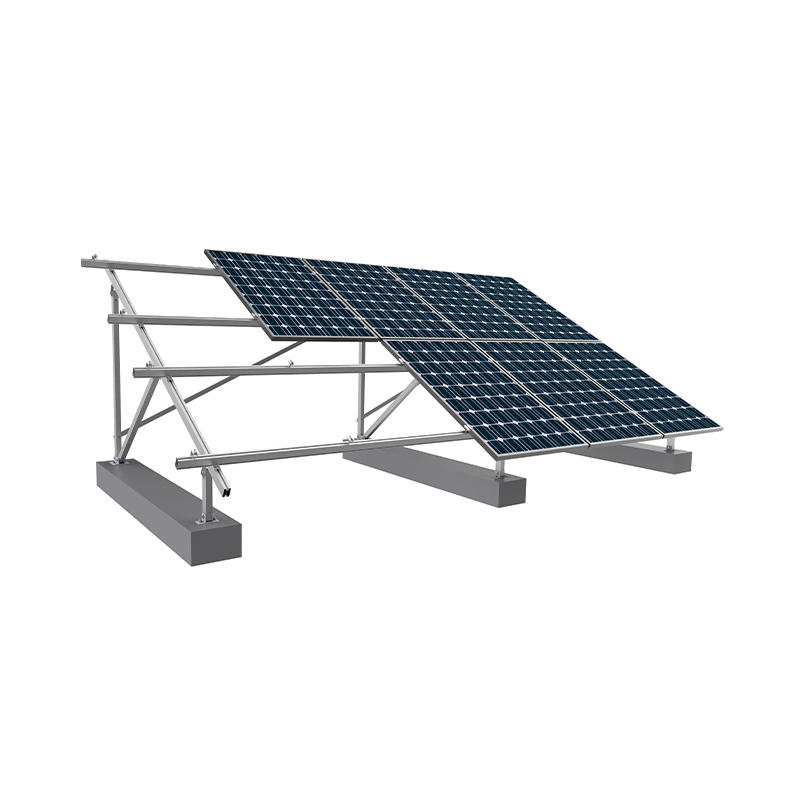
4. Floating mounting system
The floating mounting system is a special type of mounting system, which is usually used for flat roofs or flat roofs. Unlike traditional mounting systems, floating mounting systems do not directly fix photovoltaic modules on the roof through traditional fixing methods, but stabilize the mounting on the roof by adding weight or pressing weight, and usually do not require perforating the roof.
The advantage of the floating mounting system is that it does not damage the integrity of the roof, which is particularly suitable for buildings that do not want to make major changes to the roof structure. In addition, the floating mounting system is highly adaptable and can flexibly respond to different characteristics of the roof surface, especially for rental buildings or buildings that do not have long-term changes. However, since floating mounting systems have no fixings, special attention needs to be paid to wind load issues during installation in areas with strong winds.
5. Track-type bracket system
The track-type bracket system mainly carries multiple photovoltaic modules through a long track. This system can move photovoltaic panels on the track for angle adjustment and optimization. The track-type bracket system is suitable for buildings with large roof space and need to adjust the angle of photovoltaic panels. The design of the track-type bracket allows photovoltaic panels to slide horizontally, thereby adjusting the direction and angle of the components, further improving the overall power generation efficiency of the system.
The advantage of the track-type bracket is that it can achieve more flexible component adjustment to adapt to the structure and environmental conditions of different roofs. However, the installation and maintenance of the track-type bracket are relatively complicated and costly. Therefore, this type of system is more suitable for large-scale commercial or industrial projects, and is not suitable for small-scale home photovoltaic installations.
6. Folding bracket system
The folding bracket system is an innovative bracket system that can be folded or unfolded according to needs. The folding bracket not only saves space, but also can be adjusted according to actual conditions to adapt to different light angles. It is generally suitable for places where the angle needs to be adjusted according to different seasons, especially for areas with large differences in light in winter or summer.
The biggest advantage of the foldable bracket system is its flexibility, which can effectively adjust the angle of the photovoltaic panel in different time periods to adapt to different sunshine conditions. Due to its foldable design, the foldable bracket has good space utilization and is suitable for roof installation with limited space. The disadvantage is that it requires certain manual operations during installation and adjustment, which is less convenient than the automatic adjustment system.
7. High-density photovoltaic bracket system
The high-density photovoltaic bracket system is a rooftop photovoltaic system suitable for high power demand. It optimizes the layout of the bracket, reduces the gap between photovoltaic modules, and utilizes the roof space. The system is suitable for commercial and industrial applications that require efficient power generation.
The advantage of high-density brackets is that they use space efficiently, are suitable for situations where the roof area is limited, and can increase the power generation capacity per unit area. However, due to the tight layout, more attention is required during maintenance, especially in cleaning and inspection, and there may be some operational difficulties.
How to judge whether the roof is suitable for installing a PV mounting system
As the global demand for renewable energy increases, rooftop photovoltaic power generation systems have gradually become an important way for homes and businesses to use solar energy. Before installing a PV mounting system, it is a crucial step to judge whether the roof is suitable for installing a PV mounting system. Different types of roofs differ in terms of load-bearing capacity, structural stability, angles, and space, so a detailed evaluation is required.
1. Roof structure and load-bearing capacity
First of all, the structure and load-bearing capacity of the roof are the most basic factors to determine whether it is suitable for installing a PV mounting system. The photovoltaic support system itself has a certain weight, especially when installing multiple photovoltaic modules, the roof must have sufficient load-bearing capacity to support the weight of the photovoltaic support and modules. Generally speaking, the structural type of the roof determines its load-bearing capacity.
Common roof structures include wooden roofs, concrete roofs, metal roofs, and tile roofs. The load-bearing capacity of different roof materials and structures varies greatly, so before installing a photovoltaic support system, the load-bearing capacity of the roof must be evaluated in detail. For wooden roofs or tile roofs, if the load-bearing capacity is insufficient, reinforcement may be required before installation. For concrete roofs, the load-bearing capacity is usually strong, but it is also necessary to check whether there are cracks or other damage on the roof surface.
In addition, the design life and service life of the roof also need to be considered. If the roof is close to the end of its service life, it may need to be replaced or repaired, otherwise the aging problem of the roof may cause the instability of the bracket system after the photovoltaic bracket system is installed.
2. The slope and angle of the roof
The slope and angle of the roof are crucial to the installation of photovoltaic brackets. The design of the photovoltaic bracket system usually adjusts the inclination angle of the photovoltaic module according to the slope and angle of the roof to ensure that the module can receive sunlight to the greatest extent. The greater the slope of the roof, the more diverse the adjustment range and installation methods of the bracket system.
Generally speaking, the optimal installation angle of the photovoltaic system is usually between 15 degrees and 40 degrees, and the specific angle will be determined according to the geographical location and solar radiation. If the slope of the roof is too small or too large, it may be necessary to use an angle adjustment bracket to adjust the installation angle of the photovoltaic panel. In addition, a roof that is too flat or inclined may cause insufficient stability of the bracket, so structural reinforcement is required according to actual conditions.
For some flat roofs, the installation angle of the bracket system can be adjusted by adjusting the angle of the bracket itself to achieve the optimal lighting angle, while for sloping roofs, the installation method of the bracket can be determined according to the slope of the roof. In short, the slope and angle of the roof directly affect the power generation efficiency of the photovoltaic panel, so a detailed assessment is required before installation based on the actual situation.
3. Roof orientation and shading
The orientation of the roof is one of the key factors affecting the efficiency of photovoltaic power generation. The best orientation for photovoltaic modules is south, because the south can receive the most sunlight, especially in the northern hemisphere. South-facing roofs can obtain more solar radiation, thereby improving the overall efficiency of the photovoltaic power generation system. For east-facing or west-facing roofs, although the power generation efficiency is slightly lower, they can still be installed and obtain a certain amount of power generation.
In addition to the orientation, shading is also an important consideration. Surrounding trees, buildings, wires and other obstructions may affect the irradiation area of the photovoltaic module, thereby affecting the power generation efficiency. Therefore, when judging whether the roof is suitable for installing a photovoltaic bracket system, it is necessary to consider whether there are obstructions in the surrounding environment and ensure that the photovoltaic system can receive as much sunlight as possible under all-weather conditions. If there are many obstructions, you can consider reducing shading by pruning trees or adjusting the layout of the bracket system.
4. Roof surface condition and material
The surface condition and material of the roof are also key factors affecting the installation of the photovoltaic bracket system. Different roof materials will affect the installation method and firmness of the bracket system. Common roof materials include tiles, metal sheets, asphalt tiles and concrete. Each material has different characteristics and requires different bracket installation methods.
For tile roofs, it is necessary to avoid damaging the waterproof layer of the roof when installing the photovoltaic bracket, so you can choose a bracket system that does not penetrate the roof, such as a weighted bracket or a clamp bracket. For metal roofs, the bracket can be fixed by perforation, so the installation is relatively simple. Concrete roofs usually use expansion bolts or chemical anchors to fix the bracket, but it is necessary to confirm whether the structure of the roof can bear the weight of the bracket system.
In addition, the flatness of the roof surface also needs to be evaluated. If there are cracks, undulations or aging problems on the roof surface, this may affect the stability and long-term service life of the bracket system. Therefore, before installation, the roof surface needs to be inspected to ensure that there are no broken or uneven areas. If the roof is found to be seriously damaged, it may need to be repaired before considering installing the photovoltaic system.
5. Roof maintenance and safety
The maintenance and safety of the roof is one of the factors that must be considered when installing a photovoltaic bracket system. The photovoltaic bracket system needs to be installed firmly, so the stability and reliability of the roof need to be ensured. If there are structural problems with the roof, such as roof sinking, cracking or leaking, they need to be repaired before installing the PV mounting system.
In addition, the safety of the roof also needs to be evaluated. During the installation process, the construction workers need to ensure the safety of the roof to avoid safety accidents caused by improper operation. When installing the photovoltaic support system, it is necessary to ensure that the roof can bear the weight of the installation equipment and construction workers, so a detailed evaluation of the roof is required to ensure safety during the construction process.
How to choose the appropriate PV mounting system according to the roof material
The PV mounting system is the core part of the photovoltaic power generation system. Its main function is to fix the photovoltaic modules on the roof and ensure its stability and safety. The choice of roof materials directly affects the design and installation method of the PV mounting system. Different types of roof materials have different characteristics. Therefore, when selecting photovoltaic supports, factors such as the roof structure, load-bearing capacity, wind resistance, and whether it is easy to perforate must be considered comprehensively.
1. Asphalt shingle roof
Asphalt shingle roofs are common in residential buildings and have the advantages of good waterproof performance, simple construction, and low cost. However, asphalt shingle roofs are relatively thin and have limited structural bearing capacity. Therefore, when selecting a PV mounting system, special attention should be paid to the matching of bearing capacity. Because the asphalt shingle material is soft, direct drilling may cause damage to the waterproof layer and affect the sealing of the roof.
For asphalt shingle roofs, non-perforated support systems are usually selected, or support types with less penetration are used. These supports can be installed by special weight-bearing or clamping methods without penetrating the roof to avoid damaging the waterproof layer. Floating supports and weight-bearing supports are usually better choices. This type of support is easy to install and will not damage the roof structure. It is suitable for roofs with lighter loads.
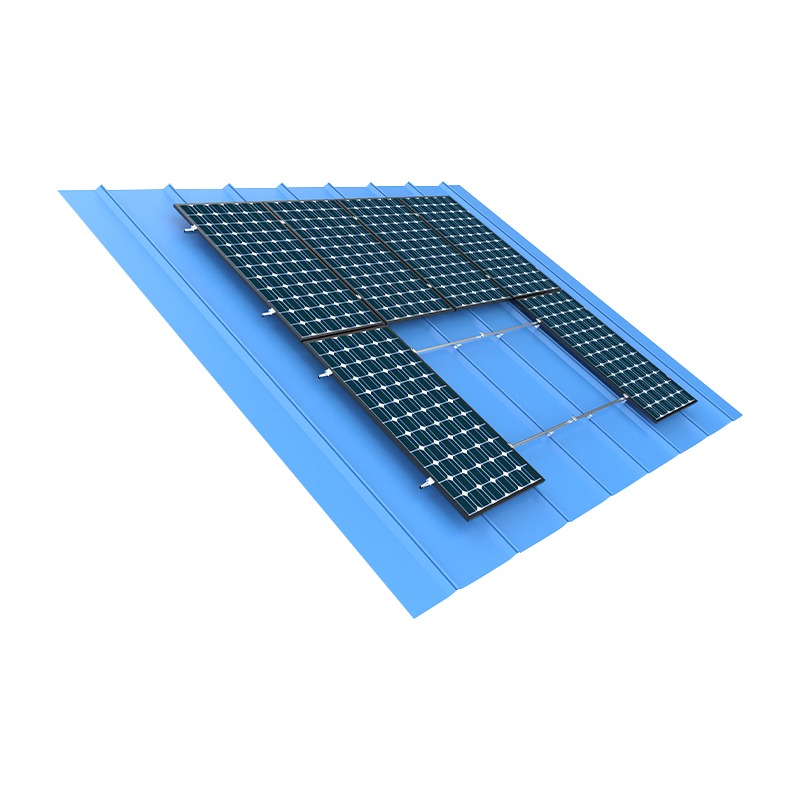
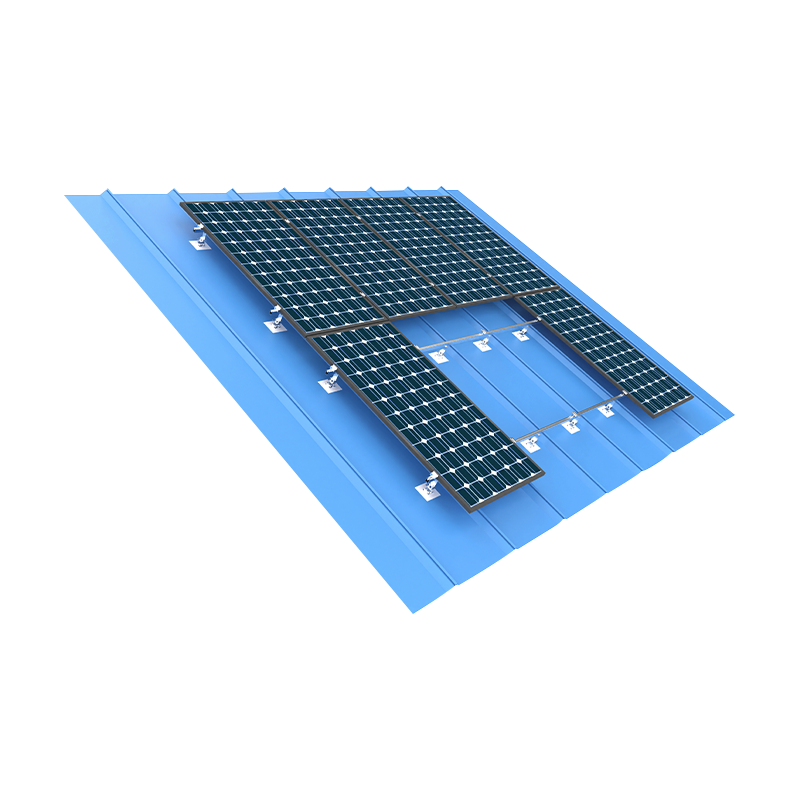
2. Metal roof
Metal roof materials include steel plates, aluminum plates, etc. Their main advantages are high strength, good durability, strong wind resistance, and good waterproofness. The roof structure of metal roofs is usually strong and can withstand large loads. Therefore, for metal roofs, you can choose a fixed photovoltaic bracket system, which is directly bolted to the roof, and the installation process is relatively simple.
When choosing a photovoltaic bracket for a metal roof, you need to consider the type and thickness of the metal material. For thicker metal roofs, the bracket system can be directly fixed to the roof by punching; for thinner metal roofs, you need to choose a bracket system with adjustable support to avoid excessive pressure on the roof. In addition, the use of anti-corrosion metal bracket systems can effectively increase the service life of photovoltaic brackets, especially in areas with relatively humid environments such as the seaside.
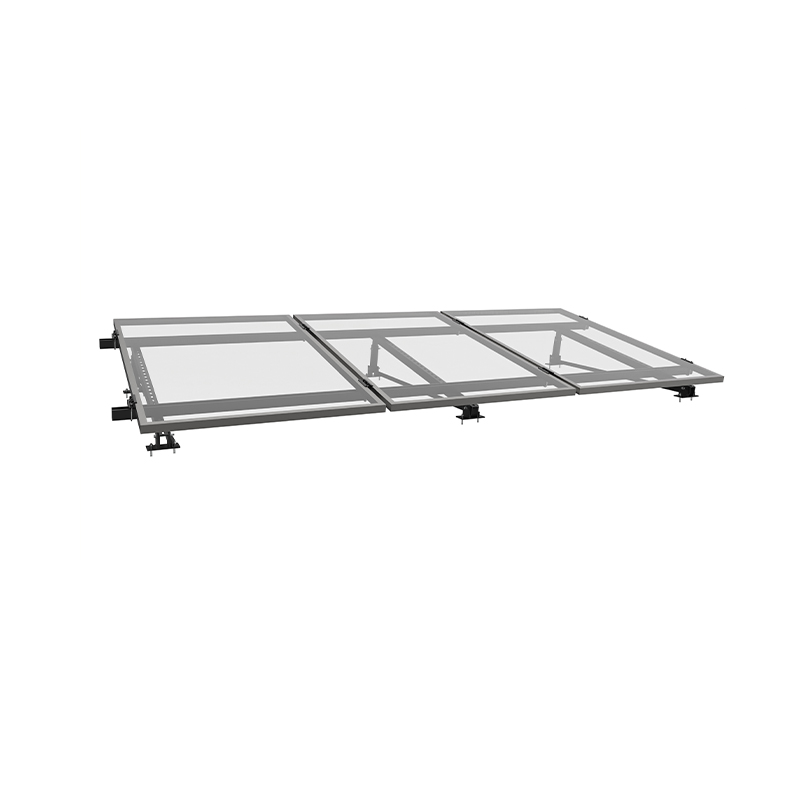
3. Flat roof
The characteristic of flat roofs is that there is no inclination, and the installation of photovoltaic modules requires the bracket system to adjust the angle of the photovoltaic panels. Flat roofs are common in commercial buildings and industrial plants. They are usually made of concrete or reinforced concrete materials and have strong bearing capacity. In this case, a variety of support systems can be used, including fixed supports, adjustable supports, and floating supports.
Since flat roofs are usually large in area and have no tilt angle, when choosing a support system, it is necessary to make reasonable angle adjustments according to the specific installation location and lighting conditions. If the lighting conditions are relatively fixed, a fixed support can be selected; if the lighting angle varies greatly with the seasons, an adjustable support can be selected, or even a support system with tracks can be used to adjust the angle of the photovoltaic module at different times. In addition, since the flat roof structure usually has a strong bearing capacity, a heavier support system, such as a ballast support, can be selected to ensure the stability of the system.
4. Concrete roof
Concrete roofs are widely used in high-rise buildings and commercial buildings. They are very strong and durable, and have strong wind resistance and load-bearing capacity. For concrete roofs, various types of support systems can be selected, especially heavy-duty supports that can withstand large loads. The requirements of concrete roofs for supports are mainly reflected in the fixing method. Generally, a perforated support system is used, that is, the support is directly fixed to the roof by punching holes to ensure the stability of the photovoltaic module.
When selecting a bracket, it is necessary to ensure that the bracket material has strong corrosion resistance, because the humidity of the concrete roof is high, which is easy to cause corrosion problems of the metal bracket. Therefore, stainless steel or anti-corrosion treated metal brackets are more suitable. In addition, when installing brackets on concrete roofs, the flatness of the roof surface must also be considered to avoid installation difficulties caused by the unevenness of the bracket and the roof surface.
5. Wooden roofs
Wooden roofs are usually used in some traditional houses or some buildings with historical value. Their structure is light and beautiful, but their load-bearing capacity is relatively weak. Therefore, the selection of photovoltaic brackets for wooden roofs requires special care to avoid damaging the roof structure or causing aging and decay of the wood. In order to protect the wooden roof, direct drilling on the roof should be avoided.
For wooden roofs, the commonly used bracket types are floating bracket systems or non-perforated bracket systems. The floating bracket system can stably fix the bracket on the roof by adding weight or pressing weight, without penetrating the roof surface, and can protect the wood from moisture and damage. In addition, you can also choose a bracket with less penetration, such as a combination of self-tapping screws and sealing materials to reduce the impact on the roof surface.
6. Tile roofs
Tile roofs are a common traditional roof type suitable for most climates. Tile roofs are structurally strong, but their surface is uneven, so it is necessary to choose a PV bracket that can adapt to the irregularities of the tile surface. The main problem with tile roofs is how to effectively fix the bracket without damaging the tiles.
For tile roofs, clamp brackets or weighted brackets are usually used. These brackets mount the PV modules on the roof by clamping or weighting without perforating the tiles. The clamp bracket system can avoid damaging the roof surface while ensuring the stability of the bracket. In addition, the installation of tile roofs also requires attention to sealing to prevent moisture penetration.
Design requirements for roof PV mounting system
As a key component of the solar photovoltaic power generation system, the roof PV mounting system bears the important responsibility of fixing the photovoltaic modules on the roof. The design of the support system must not only consider the stability and safety of the modules, but also ensure its long-term reliability and efficiency. The design requirements of the rooftop photovoltaic support system involve many aspects, including load analysis, structural stability, wind and snow resistance design, waterproof performance, installation convenience, etc.
1. Bearing capacity and load analysis
The rooftop photovoltaic support system must be able to withstand the weight of the photovoltaic modules themselves and external environmental loads (such as wind loads, snow loads, etc.). During the design, a detailed analysis of the bearing capacity of the roof is required to ensure that the support system will not be overloaded. When designing the support, the load calculation must be carried out according to factors such as the roof type, support material, and the weight of the photovoltaic modules to ensure the stability of the system.
Load analysis needs to consider static loads and dynamic loads. Static loads include the weight of photovoltaic modules, while dynamic loads mainly come from factors such as wind, snow pressure, and earthquakes. Wind load is an important factor affecting the stability of the roof photovoltaic bracket system, especially in places with high wind speed or strong wind in the area. The bracket design must take into account the influence of wind pressure and carry out necessary reinforcement in the design.
2. Structural stability and wind resistance
The roof photovoltaic bracket system must have sufficient structural stability to resist various external forces under severe weather conditions, especially strong winds. The design of the bracket system needs to consider the connection between the bracket and the photovoltaic module and the roof, as well as the strength and toughness of the material. Wind load is a key factor in design, especially in some areas with strong winds. The photovoltaic bracket system must ensure sufficient wind resistance to prevent the bracket from falling off or the photovoltaic module from being damaged in windy weather.
The wind resistance design of the bracket should follow certain specifications, taking into account the wind speed, wind pressure and roof orientation in different regions, and selecting the appropriate bracket material and structure. Common bracket structures such as single-column brackets and double-column brackets need to be designed according to the actual situation of the roof to ensure that the bracket system can maintain good stability under the action of wind load.
3. Anti-corrosion and weather resistance
Since the rooftop photovoltaic bracket system needs to be exposed to the external environment for a long time, the corrosion resistance and weather resistance of its materials are crucial. Especially in areas with humidity, salt spray, and heavy pollution, the corrosion resistance of the bracket system must meet certain standards. Common bracket materials such as aluminum alloy, stainless steel, and galvanized steel all have good corrosion resistance.
When designing, the surface treatment of the bracket also needs to take environmental factors into consideration. For example, materials with salt spray corrosion resistance should be selected in coastal areas, while in areas with more rain, special attention should be paid to anti-rust design. The connectors, bolts and other parts of the bracket should also be considered for anti-corrosion treatment to extend the service life of the bracket and ensure stability during long-term use.
4. Waterproof design
The design of the rooftop photovoltaic bracket system must ensure that the waterproof layer of the roof is not damaged to avoid unnecessary leakage risks on the roof during installation. Especially on traditional tile roofs and asphalt tile roofs, the bracket must be installed in a way that avoids damage to the roof, and the penetrating bracket should be reinforced with professional sealing materials to ensure the waterproof performance of the roof.
The non-penetrating bracket system is an important direction in waterproof design. This bracket system firmly installs the photovoltaic modules on the roof by weighting or clamping without penetrating the roof surface, avoiding damage to the roof waterproof layer. The floating bracket system is also a suitable option for roofs with high waterproof requirements. It can avoid leaving holes on the roof, thereby maintaining the integrity and waterproofness of the roof.
5. Installation convenience and maintainability
The design of the roof photovoltaic bracket system must also take into account the convenience of installation and subsequent maintenance needs. The installation of the bracket system should be simplified as much as possible to reduce installation time and labor intensity and reduce installation costs. When designing, the components of the bracket should be easy to transport, carry and assemble, reducing the tedious operations during on-site processing and construction.
In addition, the bracket system also needs to be easy to maintain and inspect in the future. During long-term use, photovoltaic modules may affect the power generation efficiency due to dust and dirt, so the bracket system needs to leave enough space for staff to clean, inspect and maintain. When designing, the spacing between brackets should be considered to ensure that there is enough space for cleaning and maintenance of photovoltaic modules after installation.
6. System compatibility
The design of the photovoltaic bracket system should also consider compatibility with photovoltaic modules. PV modules of different brands and models vary in size, weight, etc., so the bracket system needs to have a certain degree of adaptability in order to support various types of PV modules. At the same time, the bracket connection method should ensure reliable connection with the PV module to avoid loosening or displacement of the module due to mismatch between the bracket and the module.
For large-scale PV power generation systems, the design of the bracket system should also consider the coordination with other components such as inverters, cables, and monitoring systems to ensure the efficient operation of the entire PV power generation system. In large-scale projects, the design of the bracket system must take into account integration and modularity to facilitate subsequent expansion and upgrades.
How does the roof photovoltaic bracket ensure the stability and safety of photovoltaic panels?
The roof photovoltaic bracket system is an indispensable part of the photovoltaic power generation system. It carries the task of fixing the photovoltaic panels safely and stably on the roof. The photovoltaic bracket must not only ensure the fixation of the photovoltaic components, but also effectively deal with external environmental factors such as wind, rain and snow to ensure the long-term safety and stable operation of the system. The design and installation of the bracket system directly affect the stability and safety of the photovoltaic panels.
1. Strengthen the connection between the bracket and the roof
The design of the roof photovoltaic bracket system must first ensure that there is a reliable connection between the bracket and the roof. Whether it is a fixed bracket, an adjustable bracket or a floating bracket, the firmness and stability of the connection directly affect the safety of the photovoltaic components. There are usually two ways to connect the bracket system to the roof: perforated and non-perforated. The perforated bracket is fixed to the roof by bolts. This method is suitable for roofs with solid materials such as metal roofs and concrete roofs; while the non-perforated bracket is installed by weighting or clamping, which is suitable for roofs such as asphalt tiles and tiles to avoid damaging the waterproof layer of the roof.
The connecting parts of the bracket system, such as bolts, buckles, and pressure plates, are usually made of corrosion-resistant materials such as stainless steel and aluminum alloy to enhance the connection strength between the bracket and the roof. Under the action of external forces such as wind loads, heavy snow or earthquakes, these connecting parts can effectively transmit and disperse external forces to ensure that the photovoltaic panels are firmly installed on the roof, avoiding the safety hazards of photovoltaic panels falling off or shifting due to loose connections.
2. Enhance wind resistance
Wind is one of the main factors affecting the stability of rooftop photovoltaic bracket systems, especially in areas with strong winds. In order to ensure the stability of photovoltaic panels, the bracket system needs to have sufficient wind resistance. When designing, the bracket system must calculate the wind load based on factors such as wind level, roof orientation, and the influence of surrounding buildings. The material and structure of the bracket must be able to withstand the impact of strong winds to avoid displacement or falling off when the wind speed is high.
The wind resistance design of the bracket system includes increasing the wind resistance of the bracket, reasonably designing the inclination angle of the bracket, and strengthening the fixed connection with the roof. In some areas with strong winds, reinforced bracket structures are usually used to increase the weight and size of the bracket to improve the wind resistance of the system. In order to prevent the buoyancy or thrust generated by wind from affecting the photovoltaic panels, the bracket design also needs to consider the layout and installation angle of the photovoltaic panels to ensure that they can operate stably in strong winds.

3. Consider snow load resistance
In cold areas or snowy environments, the photovoltaic bracket system must also have good snow load resistance. Snow accumulation not only increases the weight of photovoltaic modules, but also may cause pressure on the bracket, especially when the roof has a small inclination angle, the snow layer is easy to accumulate, increasing the load on the bracket. Therefore, the design of the bracket needs to take into account the pressure of snow accumulation and the bearing capacity of the roof.
In order to improve the snow resistance of the photovoltaic bracket system, the design can be used to increase the bracket foundation, increase the bracket spacing, etc. to disperse the snow load to avoid excessive pressure on a single bracket. At the same time, the material of the bracket also needs to have sufficient durability to withstand long-term snow pressure without deformation or damage. Especially in high-latitude areas or snowy areas, the snow resistance design of the bracket system is an important factor in ensuring the stability of photovoltaic panels.
4. Prevent the movement and tilt of photovoltaic panels
The stability of photovoltaic brackets also needs to ensure that photovoltaic panels do not move or tilt in any horizontal or vertical direction after installation. The structural design of the bracket system should ensure that the photovoltaic panels are firmly fixed to prevent wind, vibration or other external forces from causing the photovoltaic panels to loosen or tilt. When installing the bracket, ensure that each connection point of the bracket is firm and the fixing method with the photovoltaic panel is appropriate.
Common bracket fixing methods include clamping, compression and bolt fixing, which can effectively prevent the photovoltaic panel from moving under wind or vibration. In addition, the installation angle of the photovoltaic panel also needs to be reasonably adjusted according to the lighting conditions and weather conditions of the region to reduce the impact of the external environment on the photovoltaic panel and improve its stability and power generation efficiency.
5. Prevent excessive temperature changes
Photovoltaic modules will be affected by temperature changes during long-term use, especially in areas with large temperature differences. Temperature changes may cause photovoltaic panels to expand or contract, thereby affecting the stability of photovoltaic panels. In order to avoid this situation, the design of the photovoltaic bracket should have a certain temperature adaptability, and use high-temperature and low-temperature resistant materials to ensure that the bracket can maintain its structural stability under various climatic conditions.
At the same time, the installation method of the bracket system should take into account the factors of thermal expansion and contraction. For example, there should be enough space between the bracket and the photovoltaic panel to allow the photovoltaic panel to expand and contract slightly due to temperature changes, so as to avoid excessive stress that causes damage or falling off of the photovoltaic panel.
6. Anti-corrosion and durability
The roof photovoltaic bracket system needs to be exposed to the external environment for a long time, so anti-corrosion performance is crucial. The bracket material must have good corrosion resistance to prevent corrosion in environments such as moisture and salt spray, which affects the strength and stability of the bracket. Common corrosion-resistant materials include stainless steel, aluminum alloy, galvanized steel, etc. These materials can effectively extend the service life of the bracket and avoid failure of the bracket structure due to corrosion.
The surface treatment of the bracket system also plays an anti-corrosion role. For example, the use of spraying, anodizing and other treatment methods can improve the corrosion resistance of the bracket surface, ensure that the bracket system always maintains good performance during long-term use, and avoid loosening or falling off of the photovoltaic panel due to corrosion.
7. Maintenance and repair
The design of the photovoltaic bracket system must not only ensure the stability and safety of the photovoltaic panel, but also consider the subsequent maintenance and repair. During the design, the bracket system should be easy to clean, inspect and repair to extend the service life of the photovoltaic system. Sufficient space should be left between the photovoltaic modules and the bracket to facilitate the staff to operate in daily maintenance and avoid the impact of unreasonable bracket design on the later maintenance work.
At the same time, the bracket design should avoid dust or water accumulation that affects the power generation efficiency of the photovoltaic panel. The bracket system needs to be designed into an easy-to-clean structure to avoid excessive dirt accumulating on the bracket surface or around the photovoltaic panel, which affects the operating efficiency of the photovoltaic system.
How to connect the PV mounting system to the roof structure
The PV mounting system is an indispensable part of the solar power generation system, which is mainly responsible for firmly installing the photovoltaic panels on the roof or the ground. The connection method between the support system and the roof structure directly determines the stability, safety and long-term reliability of the photovoltaic system. The correct connection method can ensure the stable operation of the support system under extreme weather conditions such as wind, rain and snow. Different types of roofs require different connection methods to ensure the firmness and protection performance of the support system.
1. Connection between wooden roof and PV mounting system
Wooden roofs are usually composed of wooden beams and wooden boards, and the load-bearing structure is relatively light. When installing photovoltaic supports, special attention should be paid to the choice of connection method because the structure of wood is relatively soft and highly variable. In general, the connection method of wooden roofs is mainly installed by bolts penetrating the roof or special fixing brackets.
Common connection methods include the following:
Penetration connection: This method is to fix the bracket to the wooden beams or wooden boards of the wooden roof by punching holes, and use expansion bolts or chemical anchors for reinforcement. It should be noted that when penetrating the roof, it should be ensured that the waterproof layer will not be damaged. During installation, the holes must be filled with sealing materials (such as waterproof gaskets) to prevent rainwater from penetrating.
Non-penetrating bracket system: For some situations where you do not want to damage the roof waterproof layer, you can choose a non-penetrating bracket system. This system fixes the bracket on the roof by clamping or weighting, and does not require drilling holes on the roof, so it will not affect the waterproof layer. Although this method is more friendly to wooden roofs, the load-bearing capacity of wooden roofs needs to be considered.
When installing photovoltaic brackets on wooden roofs, ensure that the bearing capacity of each bracket fixing point matches the structural capacity of the wooden roof to avoid loosening of the bracket due to decay or aging of the wood.
2. Connection between tile roof and photovoltaic bracket system
The connection of tile roofs is relatively complicated, and the type of tiles and the structure of the roof need to be considered in the design of the bracket system. Tile roofs usually consist of a layer of tiles and a wooden structure or concrete layer underneath. When installing photovoltaic brackets, special attention should be paid to avoid damaging the roof waterproof layer to prevent roof leaks.
Common connection methods include:
Penetrating connection: This is a method of connecting the bracket to the underlying structure of the roof by drilling holes. The bracket is connected to the wooden beams or concrete layer of the roof by bolts to ensure the stability of the photovoltaic system. During installation, the penetration holes need to be waterproofed to ensure that the waterproof performance of the roof is not affected. Waterproof pads, sealing rings or other waterproof materials are usually used to fill the holes.
Non-penetrating bracket system: Non-penetrating bracket system usually fixes the bracket system by clamping tiles or using weights. This method avoids damaging tiles and waterproof layers and is suitable for occasions where you do not want to damage the roof structure or make large-scale changes.
For tile roofs, the design of the bracket system should take into account the type and thickness of tiles and the structural bearing capacity of the roof to ensure that the weight is evenly distributed at the installation location of each bracket.
3. Connection between metal roofs and photovoltaic bracket systems
Metal roofs are often used in industrial and commercial buildings because of their lightness, durability and easy installation. The installation and maintenance of metal roofs are relatively simple, and the connection methods of photovoltaic brackets are relatively diverse. Common materials for metal roofs include steel plates, aluminum plates, etc. The bracket system can usually be connected to the roof structure by directly fixing it to the surface of the metal roof or penetrating the metal plate.
Common connection methods include:
Penetration connection: In metal roofs, the bracket is connected to the roof structure by penetrating the metal sheet of the roof. Due to the strong load-bearing capacity of metal roofs, penetration connections are usually very stable. Use waterproof materials (such as waterproof gaskets) to fill the holes to prevent rainwater from penetrating into the roof.
Non-penetration connection: If you do not want to damage the metal roof, you can choose a non-penetration bracket system. This type of bracket system fixes the bracket by clamping the metal roof, or fixes it by weight, magnetic suction, etc. In this way, the bracket does not need to punch holes or penetrate the roof surface, so it will not affect the waterproof performance of the roof. Suitable for photovoltaic installation projects that require no damage to the roof.
Metal roofs have strong wind resistance and bearing capacity, so the design of the bracket system can adopt a more flexible connection method to ensure the stability of the system.
4. Connection between concrete roof and photovoltaic bracket system
Concrete roofs are usually structurally stable and have strong load-bearing capacity, so they are suitable for installing heavier photovoltaic bracket systems. Concrete roofs are common in industrial and commercial buildings. When installing photovoltaic brackets, the brackets can be fixed by expansion bolts, chemical anchors or other reinforcement measures.
Common connection methods include:
Penetration fixing: Concrete roofs can fix the bracket to the concrete layer through expansion bolts or chemical anchors. This method is usually very stable and can withstand large loads. When performing penetration connection, it is necessary to ensure that the holes are sealed and waterproofed to prevent rainwater from seeping in.
Non-penetration fixing: For some situations where you do not want to drill holes or do not want to make large-scale damage to the building, you can choose a non-penetration bracket system. This system usually stabilizes the bracket on the roof by weighting or clamping.
For concrete roofs, the installation of the bracket does not need to worry too much about the load-bearing problem, but special attention should be paid to the contact part between the bracket and the roof to avoid damage to the roof material due to excessive local pressure.
5. Precautions for connecting photovoltaic brackets to roofs
In the installation of all roof types, the connection between the photovoltaic bracket and the roof is not only to stabilize the bracket, but also to ensure the long-term stability and safety of the system. The following points are matters that need special attention during installation:
Waterproof treatment: No matter which connection method is chosen, it is necessary to ensure that the roof waterproof layer will not be damaged. For penetration connection, materials such as sealing rings and waterproof gaskets must be used to ensure that the waterproof performance around the connection hole is intact.
Load and bearing capacity: Each roof has a different load-bearing capacity. When installing, you need to choose the appropriate connection method according to the load-bearing requirements of the roof. Especially when installing multiple photovoltaic modules, you need to ensure that the roof structure can withstand the photovoltaic panels, brackets and external environmental loads (such as wind loads, snow loads, etc.).
Safety: During the installation process, all connectors, bolts, and nuts need to be tightened to ensure a stable connection. In addition, the connection points between the bracket and the roof should be checked regularly to ensure that there is no loosening or damage during long-term operation.
Installation process of roof photovoltaic bracket system
The roof photovoltaic bracket system is an important part of the photovoltaic power generation system, carrying the key task of firmly installing photovoltaic modules on the roof. Its installation process directly affects the stability, efficiency and safety of the photovoltaic system. A standard roof photovoltaic bracket installation process usually includes planning and design, bracket installation, photovoltaic module installation and system wiring.
1. Preparation before installation
Before installing the photovoltaic bracket system, detailed site survey and planning are required. Before installation, the structure of the roof needs to be checked first to ensure that the load-bearing capacity of the roof meets the requirements. Detailed records of roof type, tilt angle, surface material, etc. are made to provide a basis for the design and installation of the bracket system.
The design of the roof photovoltaic bracket needs to be adjusted according to the actual situation of the roof. For example, for different types of roofs such as metal roofs, tile roofs, asphalt tile roofs, etc., the installation method of the bracket system may be different. The number, layout, angle and installation spacing of photovoltaic modules must also be considered during the design process to ensure that the photovoltaic system can receive sunlight at the best angle and ensure stability.
2. Selection and transportation of bracket system
Select a suitable bracket system according to the specific situation and design requirements of the roof. The bracket system usually includes components such as the base bracket, connectors, and angle adjustment devices. Depending on the roof material, there are many types of bracket systems, such as perforated brackets, non-perforated brackets (such as weighted brackets), floating brackets, etc. The materials of the bracket system are usually aluminum alloy, stainless steel, galvanized steel, etc., which have good anti-corrosion properties.
After the bracket system is determined, the next step is the transportation of the bracket components. Since the bracket system needs to be customized according to different projects, the safety of the bracket components must be ensured during transportation to prevent damage or deformation during transportation. The installation team needs to check all bracket components in advance to ensure that the accessories are complete and replace or repair damaged components.
3. Install the bracket foundation
The first step in the installation process of the bracket is to install the bracket foundation. For different types of roofs, the installation method of the bracket foundation is different. For concrete roofs, perforated brackets can be used to fix the bracket to the roof with expansion bolts or chemical anchors. For tile roofs or asphalt tile roofs, non-perforated bracket systems can be used. This type of bracket fixes the photovoltaic bracket by weighting or clamping to avoid damaging the roof waterproof layer.
When installing the support foundation, ensure that the support foundation is positioned accurately and can withstand the loads of the photovoltaic modules and the external environment (such as wind load, snow load, etc.). The installer needs to accurately measure the installation position of the support according to the design drawings to avoid the support spacing being too large or too small to ensure the stability of the photovoltaic modules.
After the support foundation is installed, it is also necessary to check the horizontality and verticality to ensure that each support can be stably installed at the predetermined angle and position to avoid tilting or unevenness of the support.
4. Install the support columns and beams
After the support foundation is installed, the next step is to install the support columns and beams. The support column is the main part of the support photovoltaic module, usually made of aluminum alloy or stainless steel. When installing the column, the column is required to be tightly connected to the roof foundation, and the height of the column needs to be adjusted according to the tilt angle of the photovoltaic module to ensure that the photovoltaic module can receive sunlight at the best angle.
When installing the column, the level and plumb meter must be used for precise adjustment to ensure that each column is vertical and stable. Once the column is installed, the beam needs to be installed next. The function of the beam is to connect the columns to form a stable support frame. The beams are usually connected by quick locking, making the installation process easier and more efficient.
The connection between the columns and beams can be bolted or snapped, depending on the design of the bracket system. During the installation process, all bolts and snaps should be tightened to avoid loosening or safety hazards in later use.
5. Installing photovoltaic panels
After the bracket frame is built, the photovoltaic panel installation stage begins. Photovoltaic panels are usually installed by fixing them to the brackets. The installation position and direction of each photovoltaic panel must be precisely in accordance with the design requirements. The connection between the photovoltaic panel and the bracket is usually fixed by clamps or bolts.
When installing photovoltaic panels, the installer must ensure that the direction and angle of the photovoltaic panels meet the design requirements to avoid skew or uneven photovoltaic panels. During the installation process, appropriate gaps should be left between photovoltaic panels to allow air circulation, reduce temperature rise, and ensure long-term and efficient operation of the photovoltaic panels.
After the photovoltaic panels are installed, it is also necessary to check whether the connection between the photovoltaic panels and the brackets is firm, and ensure that the surface of the photovoltaic panels is clean and there is no dirt or debris that affects the power generation efficiency of the photovoltaic panels.
6. Electrical connection and wiring
After the photovoltaic bracket and photovoltaic panel are installed, the next step is electrical connection and wiring. Wiring is the key link to ensure that the photovoltaic power generation system can work properly. During the wiring process, it is necessary to reasonably select cables, connectors and inverters according to the voltage and current parameters of the photovoltaic components and the design requirements of the system.
When wiring, all cables need to be routed in accordance with standard specifications to ensure that the cables are not damaged by external forces and avoid excessive cable bending. The cables should be fixed with special cable clamps or brackets to avoid direct contact between the cables and the roof surface and prevent cable aging due to friction or ultraviolet radiation.
After all electrical connections are completed, the installer needs to conduct an electrical inspection of the system to ensure that each connection point has good contact and there is no risk of short circuit or leakage in the electrical line. At the same time, the working status of the inverter should be checked to ensure that it can normally convert DC to AC.
7. Final inspection and commissioning
After all installation work is completed, the last step is to conduct a final inspection and commissioning of the system. This includes checking the stability of the bracket system, ensuring that all connecting parts are fastened in place, and the photovoltaic panels are not loose or tilted. At the same time, the electrical system needs to undergo a detailed safety inspection to ensure that the electrical connection meets safety standards and avoid electrical accidents.
During the debugging process, the system's output power, charging efficiency and other performance indicators need to be tested to ensure that the photovoltaic system can operate normally after installation and achieve the designed power generation capacity. The installer should keep a detailed record of the operating status of the entire system and optimize and adjust the system according to actual conditions.
Does the photovoltaic bracket system need regular maintenance?
As an important part of the photovoltaic power generation system, the photovoltaic bracket system is responsible for firmly installing the photovoltaic modules on the roof or the ground. The stability of its design and installation is directly related to the long-term operating efficiency and safety of the entire photovoltaic system. Although the photovoltaic bracket system itself does not have complex electrical components, it still needs regular inspection and maintenance. The maintenance of the bracket system can not only extend its service life, but also ensure the overall performance and safety of the photovoltaic system.
1. Anti-corrosion performance of the bracket system
The photovoltaic bracket system is usually installed outdoors and exposed to the natural environment for a long time. External factors such as climate change, wind, precipitation, and ultraviolet rays will affect the materials of the bracket, especially the metal bracket, which is susceptible to corrosion. In humid, salt spray, strong sunlight and other environments, the surface treatment and anti-corrosion coating of the bracket may gradually age, leading to corrosion.
Regular maintenance can effectively detect whether the anti-corrosion layer of the bracket is intact, detect corrosion problems in time, and repair or replace them. For example, when the aluminum alloy bracket is exposed to a humid environment for a long time, the surface oxide layer may degrade due to ultraviolet radiation and rain erosion, affecting its anti-corrosion performance. Therefore, it is necessary to regularly inspect the support system, especially the surface coating of the support, to ensure good anti-corrosion effect and prevent long-term corrosion from damaging the support system.
2. Inspection of fasteners and connecting parts
The stability of the PV mounting system mainly depends on the firmness of the fasteners and connecting parts. Over time, the connection between the support and the roof or the ground may loosen due to temperature changes, wind or other external factors. The loosening of fasteners will not only cause the support to be unstable, but also affect the installation position of the photovoltaic module, affect the power generation efficiency of the system, and may even cause the photovoltaic module to fall, causing safety hazards.
Therefore, regular inspection and reinforcement of fasteners such as bolts, nuts, and buckles in the support system is an important measure to ensure the long-term stable operation of the support system. In high wind speed areas, wind loads may cause additional pressure on the support system, causing the connection parts to loosen or deform, so it is necessary to regularly check the fastening status of these parts to prevent safety hazards caused by loosening.
3. Cleaning and dust accumulation problems
Although the main function of the PV mounting system is to support photovoltaic modules, the gaps and joints between the support and the photovoltaic panel may also become places for dust accumulation. Especially in arid and dusty areas, dust and dirt easily accumulate on the surface of the bracket or between the bracket and the photovoltaic module, affecting the air circulation and heat dissipation of the photovoltaic system, and thus affecting the power generation efficiency of the photovoltaic panel.
Regularly cleaning the bracket system and its surrounding environment can not only improve the power generation efficiency of the photovoltaic system, but also prevent dirt from eroding the bracket material. During the cleaning process, special attention should be paid to not damaging the anti-corrosion layer of the bracket, and avoid using too rough tools or cleaning agents. Regular cleaning is particularly important in some hot or dusty environments.
4. Preventive inspection and maintenance
Another important aspect of regular maintenance of photovoltaic bracket systems is to conduct preventive inspections. Photovoltaic bracket systems are generally a long-term investment, usually with a design life of 25 years or even longer. Therefore, it is more economical and efficient to detect potential problems and repair them in time than to carry out large-scale repairs after serious failures.
For example, the wind resistance of photovoltaic brackets is a key factor in system design. As the use time increases, the wind resistance of the bracket may be damaged. Regularly check the overall stability of the bracket, especially after storms and strong winds, to check whether the bracket is loose or damaged to ensure that the photovoltaic modules can remain stable under adverse weather conditions.
In addition, the angle adjustment device of the bracket, the connection between the bracket and the roof, and the foundation of the bracket need to be checked regularly. By discovering potential problems in the bracket system in advance, the failure rate in system operation can be effectively reduced and the overall reliability of the photovoltaic system can be improved.
5. Earthquake and snow resistance design of the bracket system
In areas with severe earthquakes or snow accumulation, the earthquake resistance and snow resistance of the bracket system are particularly important. Over time, the roof photovoltaic bracket system may be deformed due to earthquakes or snow pressure, especially in mountainous areas or high latitudes, where snow pressure may gradually affect the bracket system.
Regularly checking the earthquake resistance and snow resistance of the bracket can effectively avoid damage to the bracket caused by snow or earthquakes. In some high snow areas, special attention should be paid to the contact area between the bracket and the roof to prevent deformation or damage of the bracket due to excessive snow or ice. Especially for traditional tile roofs and metal roofs, the bracket system needs to be checked regularly to ensure that it can withstand loads under various climatic conditions.
6. System improvement and technology update
With the advancement of photovoltaic industry technology, new bracket systems are constantly emerging with better structural optimization and higher safety performance. During regular maintenance, it is also possible to consider technical updates or improvements to old bracket systems. For example, wind-resistant or snow-resistant reinforcement components can be added to the original bracket system, or new materials can be used to replace the original bracket system to improve the overall stability and service life of the system.
During regular maintenance, the performance of the bracket system can be evaluated, and the bracket can be upgraded and renovated in a timely manner in combination with current technological developments. This can not only extend the service life of the photovoltaic bracket system, but also improve the power generation efficiency of the system, and further improve the overall economic benefits of the photovoltaic power generation system.
7. Maintenance cycle and implementation standards
The maintenance cycle of the photovoltaic bracket system varies depending on the region, environment and system design. Generally speaking, for photovoltaic bracket systems in general environments, a comprehensive inspection and maintenance once a year is a common cycle. In special environments such as strong winds, heavy snow, and high humidity, the maintenance cycle of the bracket may need to be shortened. The frequency and specific content of maintenance should be determined based on actual conditions and the system usage environment.
Message Us Now !
 +86-523-80509588

 11th Floor, Wenchuang Building, 60 Fenghuang East Road, Hailing District, Taizhou City, JiangSu, China
Mounting Systems
Copyright © Taizhou Dongsheng New Energy Technology Co., Ltd.
All Rights Reserved.
 OEM/ODM Solar Panel Mounting Bracket Manufacturers