English
 日本語
 Deutsch
 عربى
 中文


Balcony Solar Mounting System: Selection, Safety, and Installation Guide
 2026.10.22
 Industry News
A renter in a fourth-floor apartment bought two 400 W panels, a micro-inverter, and a cheap railing clamp kit. Six weeks later, one panel was on the ground after a 70 km/h gust. The failure was not the panel or the inverter. It was the mounting system. A balcony solar mounting system holds a plug-in panel to a railing, wall, or floor slab. It decides whether the array survives wind, stays corrosion-free, and satisfies the building owner. Choose it before you buy panels.
What a Balcony Solar Mounting System Includes
A complete kit is more than two brackets. For a typical 400 W panel, expect these parts:
- Two or four anodized aluminum rails, usually 6063-T5, 30–40 mm wide.
- Railing clamps or wall brackets that transfer load to the structure.
- Panel end clamps and mid clamps with rubber pads to protect the frame.
- A tilt adjuster if you want to change the angle between seasons.
- Stainless steel A2 or A4 bolts, washers, and lock nuts.
- Cable clips and a drip loop guide to keep water away from the inverter.
A roof mount can rely on rafters and gravity. A balcony mount often cannot. It must clamp a 40 mm railing tube or a 100 mm concrete parapet without drilling. Aluminum rails save weight and resist rust. Stainless fasteners prevent the white oxide that appears when zinc-plated bolts touch aluminum in coastal air. If a supplier offers only painted carbon steel for a seaside balcony, walk away.
Match the Mount to Your Balcony Structure
Three families cover almost every balcony. The right one depends on what you can clamp, drill, or ballast.
| Mount type | Best for | Fixation method | Tilt range | Wind rating (typical) | Relative cost |
|---|---|---|---|---|---|
| Railing clamp | Metal or glass balustrade, 30–60 mm tube | Two clamps per rail, no drilling | 0–15° fixed | Up to 60 m/s | Low |
| Wall bracket | Solid concrete or brick wall above the balcony | Four M10 anchors, sealed | 10–35° adjustable | Up to 70 m/s | Medium |
| Floor ballast | Rented flats where drilling is banned | Concrete blocks or water tanks | 10–30° adjustable | Up to 45 m/s | High (weight) |
| Hybrid rail | Wide parapet with a flat top | Clamp plus optional anchor | 0–30° adjustable | Up to 65 m/s | Medium |
A railing clamp is the fastest option, but check the railing's design load. A glass balustrade rated for 0.5 kN/m may not accept a 25 kg panel plus 1.5 kN of wind uplift. A wall bracket gives more tilt freedom but usually needs a landlord's permission. Floor ballast avoids drilling but adds 60–100 kg. Never rely on sandbags alone above the third floor.
Wind, Corrosion, and Compliance: The Three Filters
Every buying decision should pass three checks in this order. Skip one and the system may fail within a year.
Wind uplift
Wind pulls a panel up and sideways. A 400 W panel at 30° tilt can see 1.2–1.8 kN of uplift at 50 m/s. The chart below shows how peak wind pressure rises with gust speed for a 1.7 m² panel with a drag coefficient of 1.2.
Wind pressure on a 1.7 m² panel at 30° tilt
30 m/s (108 km/h)
40 m/s (144 km/h)
50 m/s (180 km/h)
60 m/s (216 km/h)
Red bar exceeds the 1.8 kN design limit of a typical railing clamp.
Match the mount's certified wind speed to your local 50-year gust. Coastal areas and high-rise balconies need 60 m/s or more. Ask for a test report, not a sales claim.
Corrosion
Use A4 stainless steel within 1 km of the sea, A2 stainless for inland cities. Avoid mixing galvanized bolts with aluminum rails without isolating washers. The cost difference is a few euros per kit; the repair cost is a new panel.
Compliance and safety
Check three documents before installation: the building's facade alteration rules, the local plug-in solar limit, and the inverter's grid-code certificate. A mounting system with a tilt above 30° may need a structural sign-off on a high floor. If the supplier cannot provide a load calculation or a declaration of performance, find another supplier.
Installation Sequence and Common Mistakes
Installation takes two people and about 90 minutes for a single panel. Follow this order:
- Measure the railing or wall and mark the clamp positions.
- Assemble the rails and clamps on the ground.
- Lift the frame into place and tighten bolts to the supplier's torque figure, usually 15–20 N·m for M8 stainless.
- Set the tilt angle, then lock the adjuster.
- Mount the panel with mid and end clamps, leaving a 2 mm gap for thermal expansion.
- Route the DC cable through a drip loop and connect the micro-inverter.
- Pull-test the frame by hand, then check every bolt after the first week.
Four mistakes appear in almost every failed installation. Over-tightening cracks the anodized layer and starts corrosion. Skipping rubber pads lets the aluminum frame rub against the rail. Using a single clamp per rail instead of two lets the panel rotate in gusty conditions. Ignoring drainage creates a water pocket that freezes and splits the clamp. None of these are expensive to avoid, but all of them void a warranty.
Yield and Payback: What the Mount Changes
A mounting system does not generate electricity, but its tilt angle changes annual yield by 10–20%. The bar chart below shows relative annual yield for a 400 W panel in a temperate latitude (50° N) at different tilt angles.
Relative annual yield by tilt angle (50° N)
0° (flat)
15°
30°
45°
Based on typical irradiation data; actual yield varies with shading and latitude.
For a 400 W panel at 30° tilt in a city with 1,100 kWh/m² annual irradiation, expect about 420–480 kWh per year. At a €0.30/kWh retail rate, that is €126–€144 saved per year. A €250 mounting kit plus €400 panel and inverter pays back in 4–5 years. A non-adjustable railing clamp at 0° tilt adds roughly one year to that payback. If you can adjust the tilt twice a year, the extra cost of an adjustable mount is usually recovered in 18 months.
Choosing a Supplier: What to Verify
Balcony mounts are a small part of the PV market, so many suppliers rebrand generic brackets. Ask for four documents: a wind load calculation for your panel size, a corrosion test report for the fasteners, a declaration of performance for the aluminum grade, and a warranty that covers the mount for at least 10 years. A supplier that manufactures its own rails and brackets can usually provide these faster than a trading company.
Suneast New Energy has produced PV mounting systems since 2009 and holds ISO quality system certification and multiple patents. The company reported supplying more than 1.5 GW of distributed mounting in 2023, including balcony systems. For a balcony project, the relevant product line is the balcony PV mounting system, which uses anodized aluminum rails and stainless steel fasteners and offers fixed and adjustable tilt versions. The company also publishes application notes on balcony PV mounting for modern homes, covering railing and wall configurations.
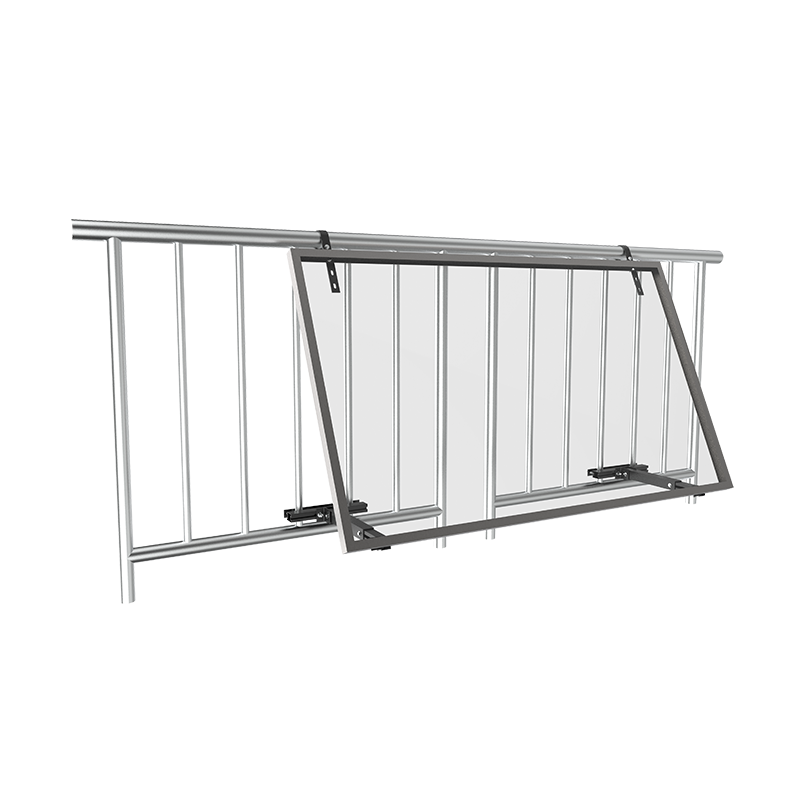 Residential Balcony PV Mounting SystemModular balcony PV mounting solution with anodized aluminum rails and stainless steel fasteners, offering fixed or adjustable tilt for residential solar installations.View Product →
If you need a specific bracket for a glass balustrade or a wide parapet, the detailed balcony mounting page lists clamp sizes and tilt options. Verify the clamp diameter against your railing before ordering; a 5 mm mismatch is the most common return reason.
 Adjustable Balcony PV Mounting SystemModular balcony PV mounting with angle-adjustable brackets, windproof locks, and anti-fall design for residential or small distributed solar installations.View Product →
Finally, compare the total delivered cost, not the kit price. A low-cost mount that needs extra clamps, longer bolts, or a second trip from the hardware store often costs more than a complete kit. Ask for a parts list with every nut and washer included.
A balcony solar mounting system is the difference between a panel that produces for 20 years and one that becomes a liability after the first storm. Measure your railing or wall, confirm the wind and corrosion requirements for your location, and choose a mount with adjustable tilt and stainless steel fasteners. Then verify the supplier's load calculations and warranty. The panels and inverter get the attention, but the mount keeps them where they belong.
Message Us Now !

 +86-0523-80509588

 11th Floor, Wenchuang Building, 60 Fenghuang East Road, Hailing District, Taizhou City, JiangSu, China
Mounting Systems
Copyright © Taizhou Suneast New Energy Technology Co., Ltd.
All Rights Reserved.
 OEM/ODM Solar Panel Mounting Bracket Manufacturers